On This Page
Create REST–API Response Key

To enable message-level encryption (MLE) for your SDK integration, you must create a
REST–API response key. This section describes how to create and test a REST–API response
key.
Overview of MLE
Message-Level Encryption (MLE) enables you to store information or communicate with
other parties while helping to prevent uninvolved parties from understanding the
stored information. Enabling MLE requires you to create a
P12 certificate
or
shared secret key pair
for encrypting your requests and a REST – API
Response MLE
key for decrypting received responses. If your organization is
using meta keys, your security keys must be created by the same portfolio or
merchant account.Step 3A: Create or Submit a REST—API Response MLE
Key
Before you can enable your system to support MLE, you must create or upload a
REST—API
response MLE
certificate. After creating or uploading the certificate, you can
extract the certificate's key to begin enabling MLE. If your organization is using meta
keys, the shared secret key pair
and REST – API response MLE
key must be
created by the same portfolio or merchant account.Follow these steps to create or submit an API Response MLE certificate in
the
Business Center
:- Log in to theBusiness Center:
- On the left navigation panel, choose
 Payment Configuration > Key Management.
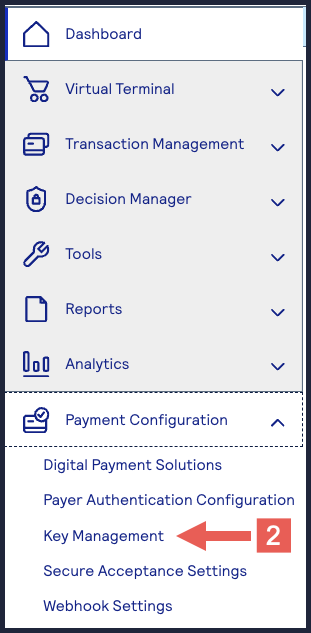
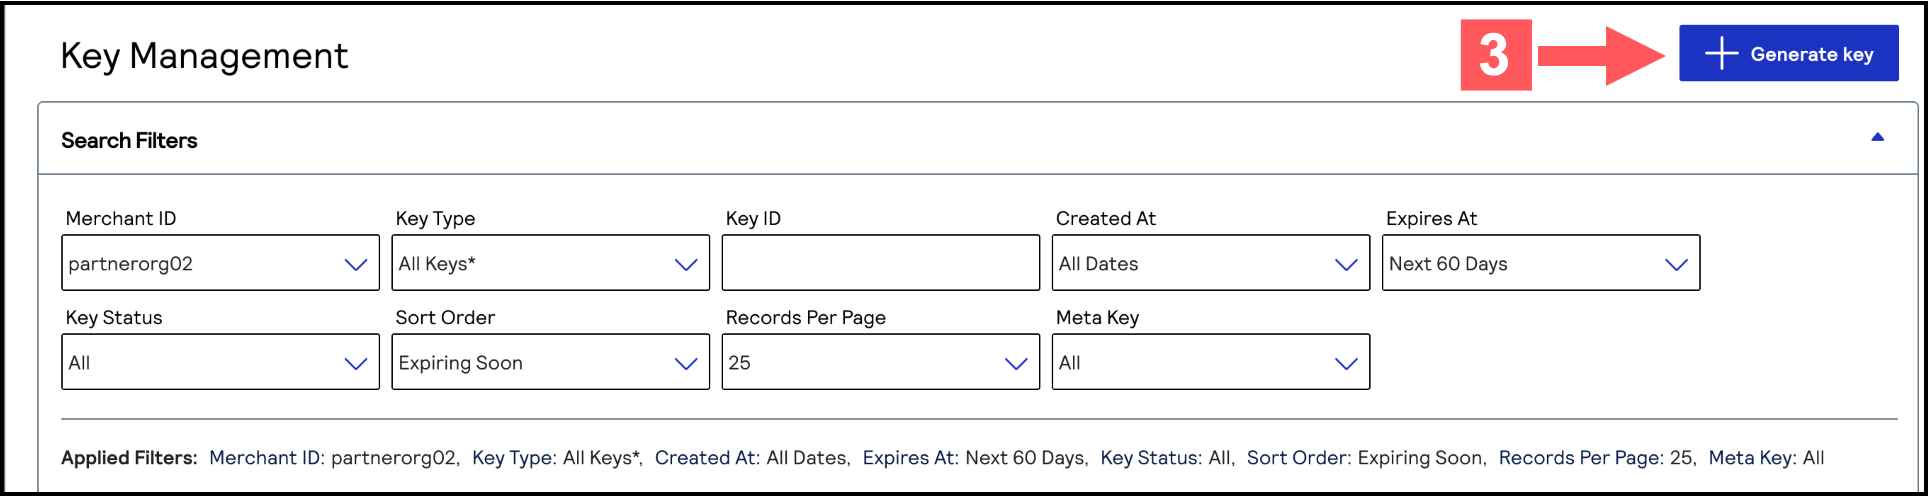
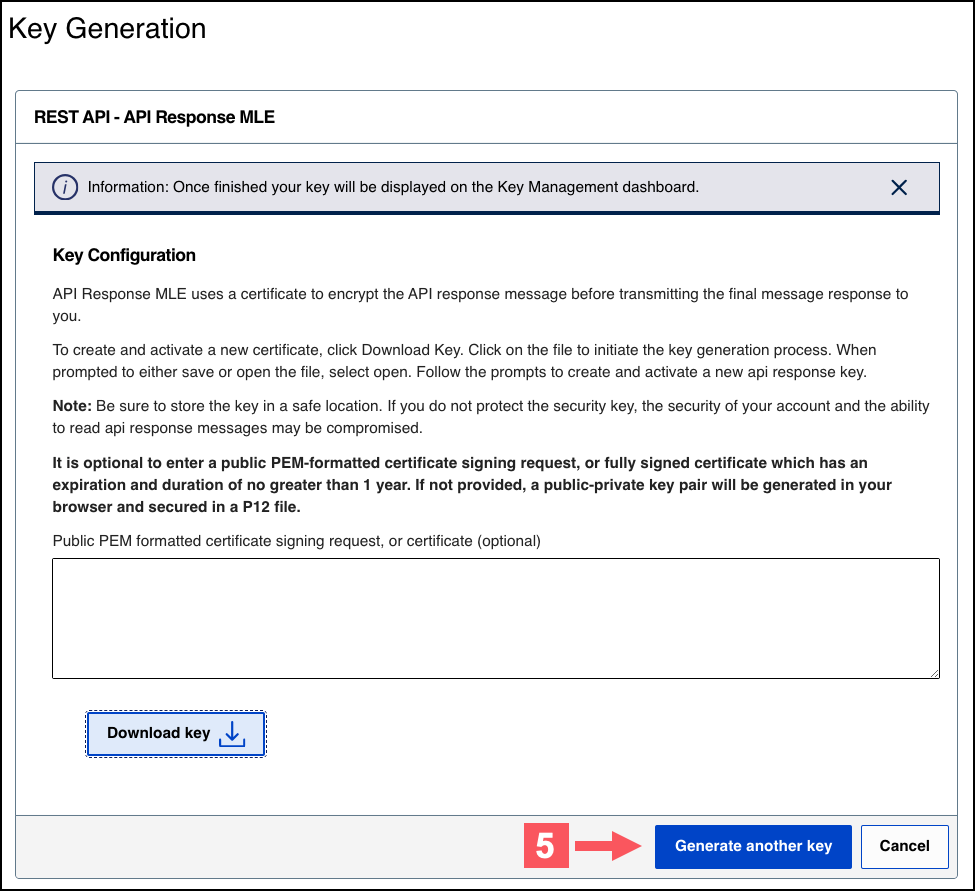
- Click+ Generate keyon the Key Management page.
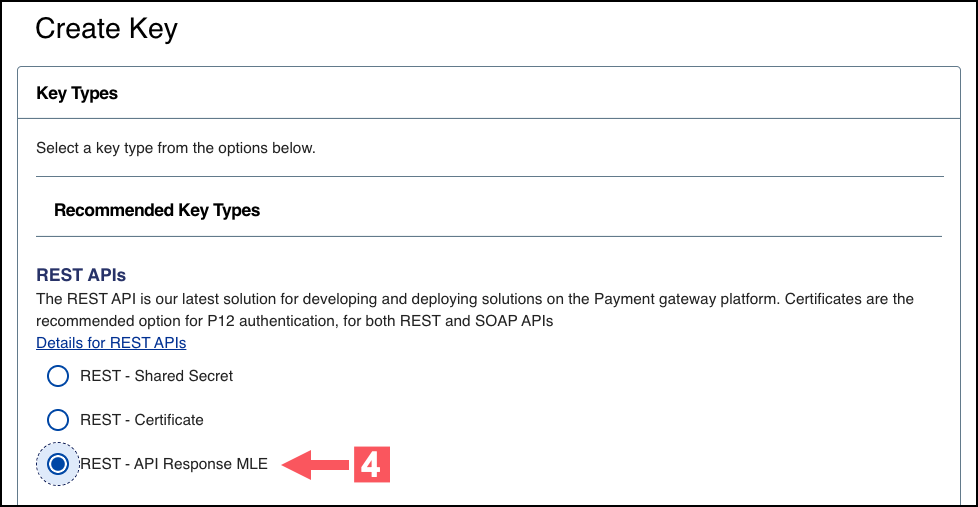
- Under REST APIs, chooseREST – API Response MLE, and then clickGenerate key.
- Choose one of these options to download your key:
- To create a new API response MLE certificate, clickDownload key
 .
. - To upload your own certificate, enter your public PEM-formatted certificate in the text box, and then clickDownload key
. The
.pemfile downloads to your desktop. If prompted by your system, approve the location to which the file downloads.
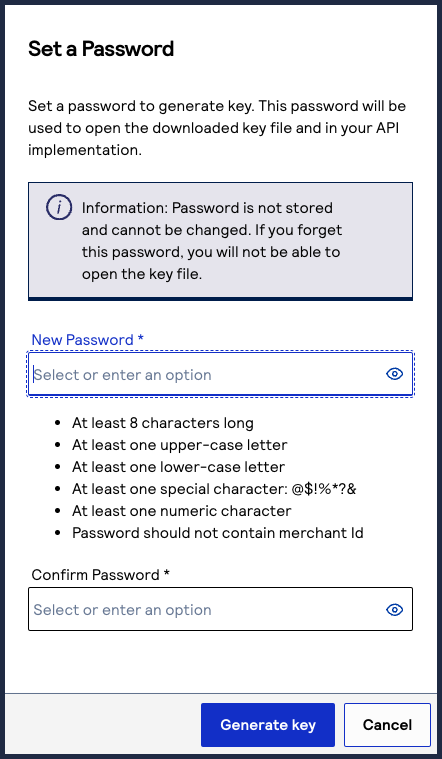
- If you are creating a certificate, the Set a Password window appears. Create a password for the certificate by entering the password into theNew PasswordandConfirm Passwordfields, and then clickGenerate key.The.p12file downloads to your desktop. If prompted by your system, approve the location to which the key downloads.
 To create or submit another key, clickGenerate another key. To view all of your created keys, go to the Key Management page.IMPORTANTSecurely store the.p12file and password in your system. These credentials are required in order to implement certain products, and you must be able to access them.
 - ClickCancel.The Key Management page appears.
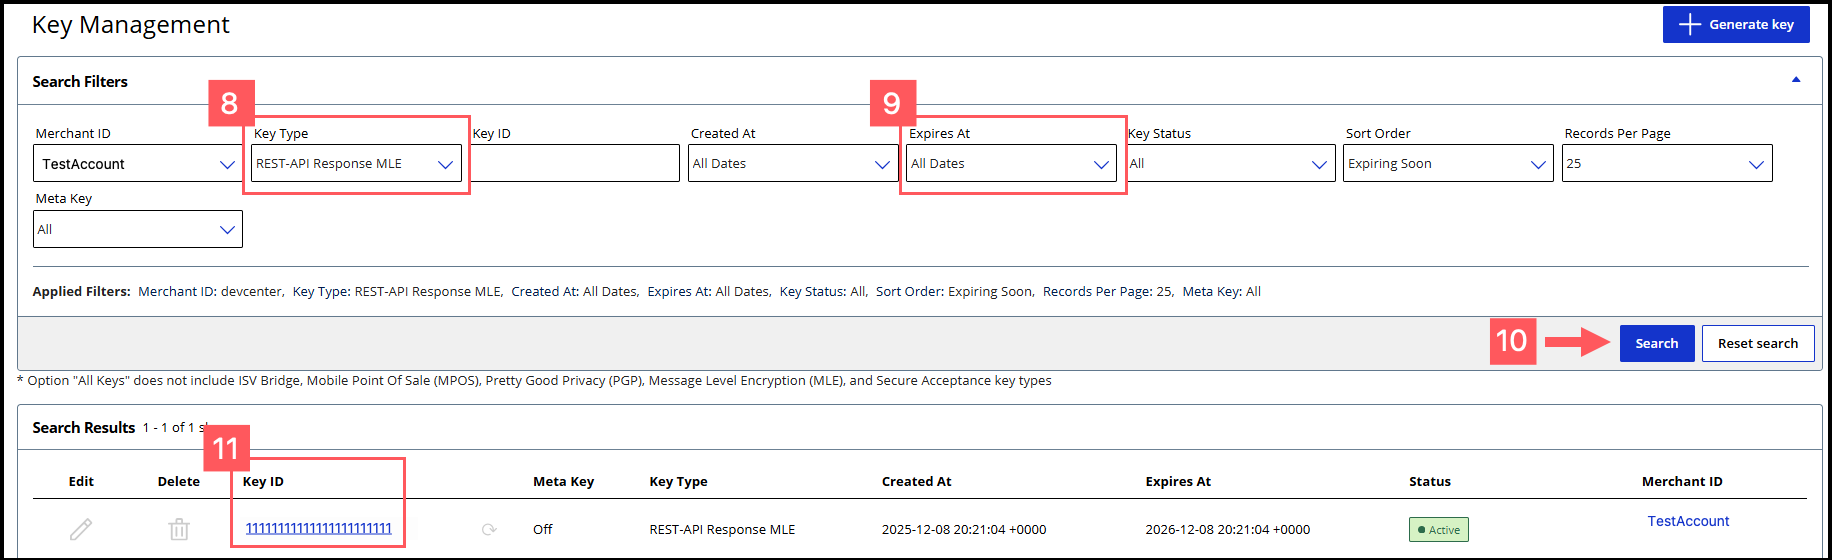
- Click theKey Typefilter and chooseREST-API Response MLE.
- Click theExpires Atfilter and chooseAll Dates.
- ClickSearch.
- Find the REST–API Response key that you created in the Search Results table and save its key ID.The key ID is needed to test and configure your system to use MLE.
- Test Your REST–API Response MLE Key
- To test your REST–API Response key, see Test Your REST–API Response MLE Key.
Step 3B: Test Your REST-API Response Key
Follow these steps to verify that your API response MLE key is working:
- Go to the REST API Reference page in theCybersourceDeveloper Center:
- On the left navigation panel, choose an API that supports MLE. For testing purposes, you can chooseIntelligent Commerce > Intelligent Commerce Product > Enroll a Card.MLE support is indicated byRequest MLEandResponse MLEat the top of the screen.

- Choose theMLE Configurationtab.
- In the Message Level Encryption Credentials section, enter your API response MLE key credentials:
- Response encryption:Enter the key ID of your REST—API response MLE key.You saved this key ID in Step 10 in the Create or Submit a REST—API Response MLE Key section in Enable Message-Level Encryption.
- Response decryption:ClickBrowseto submit your own private decryption key from your local system. Only.p12files are supported.
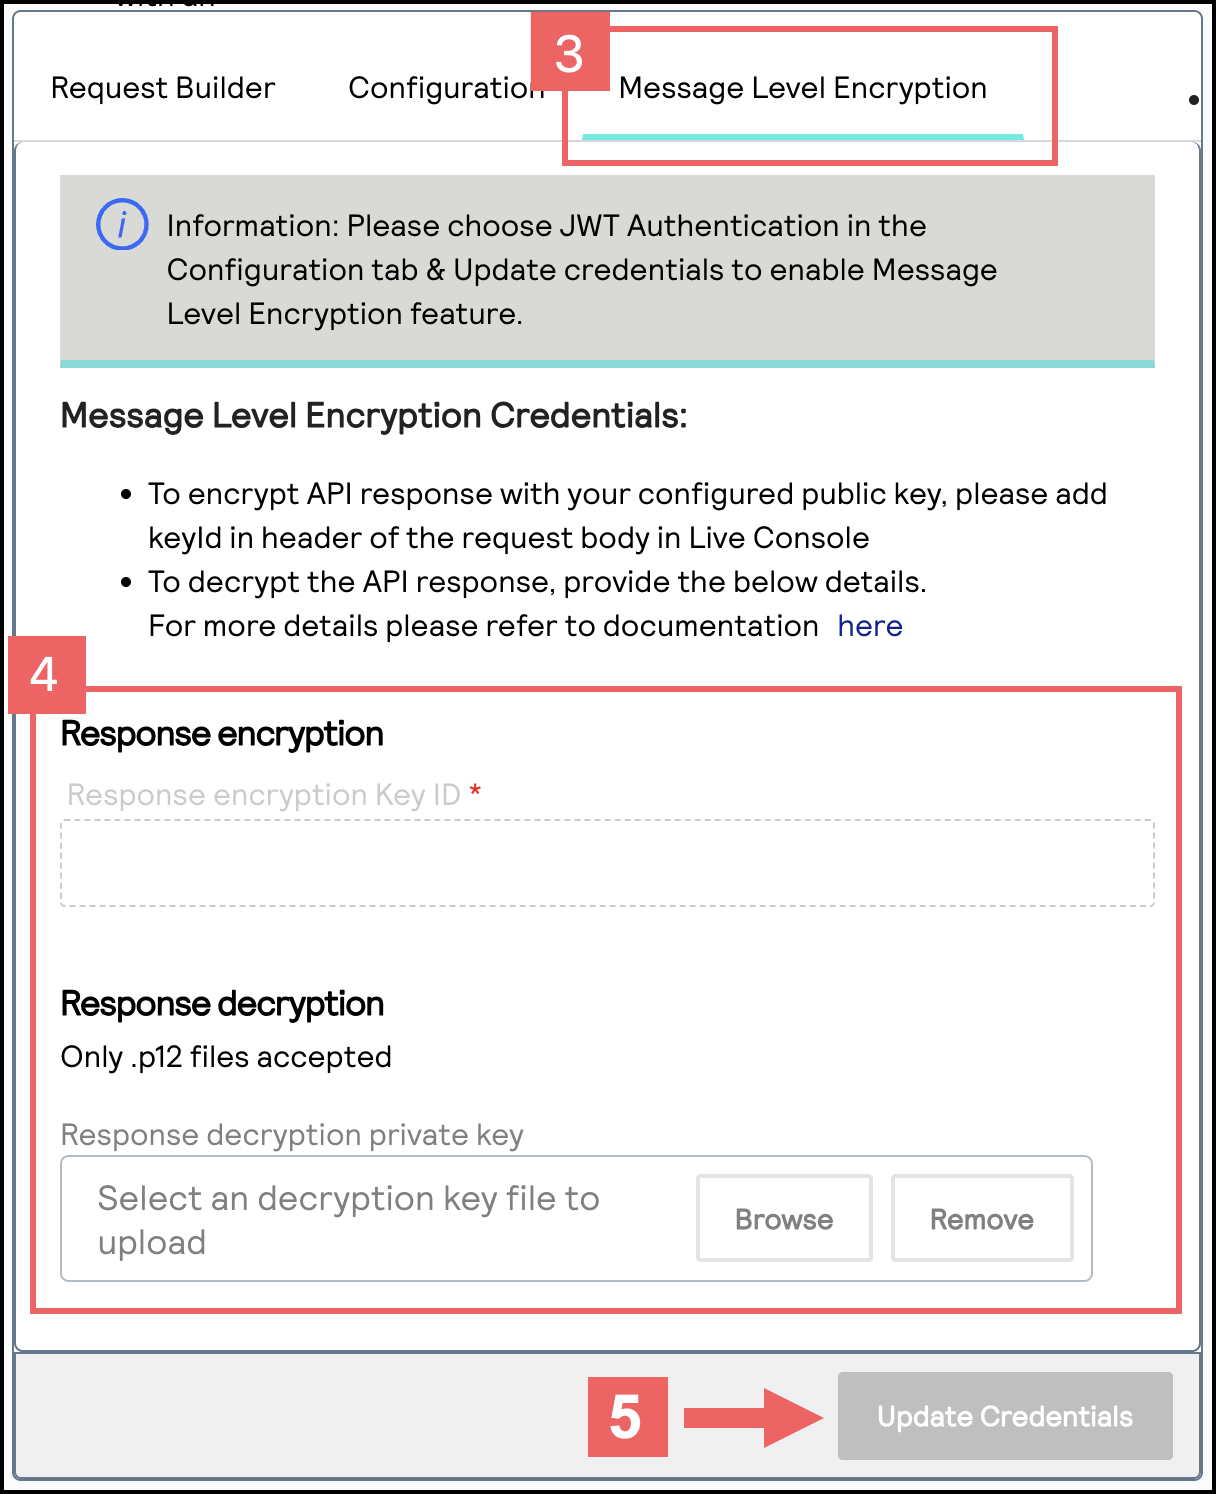
- ClickUpdate Credentials.
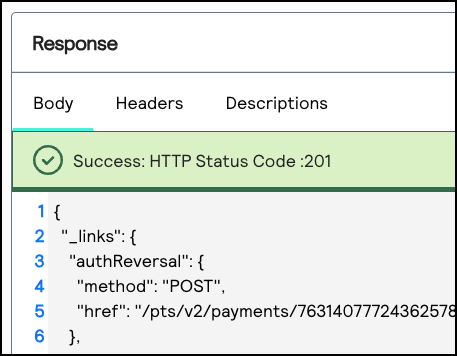
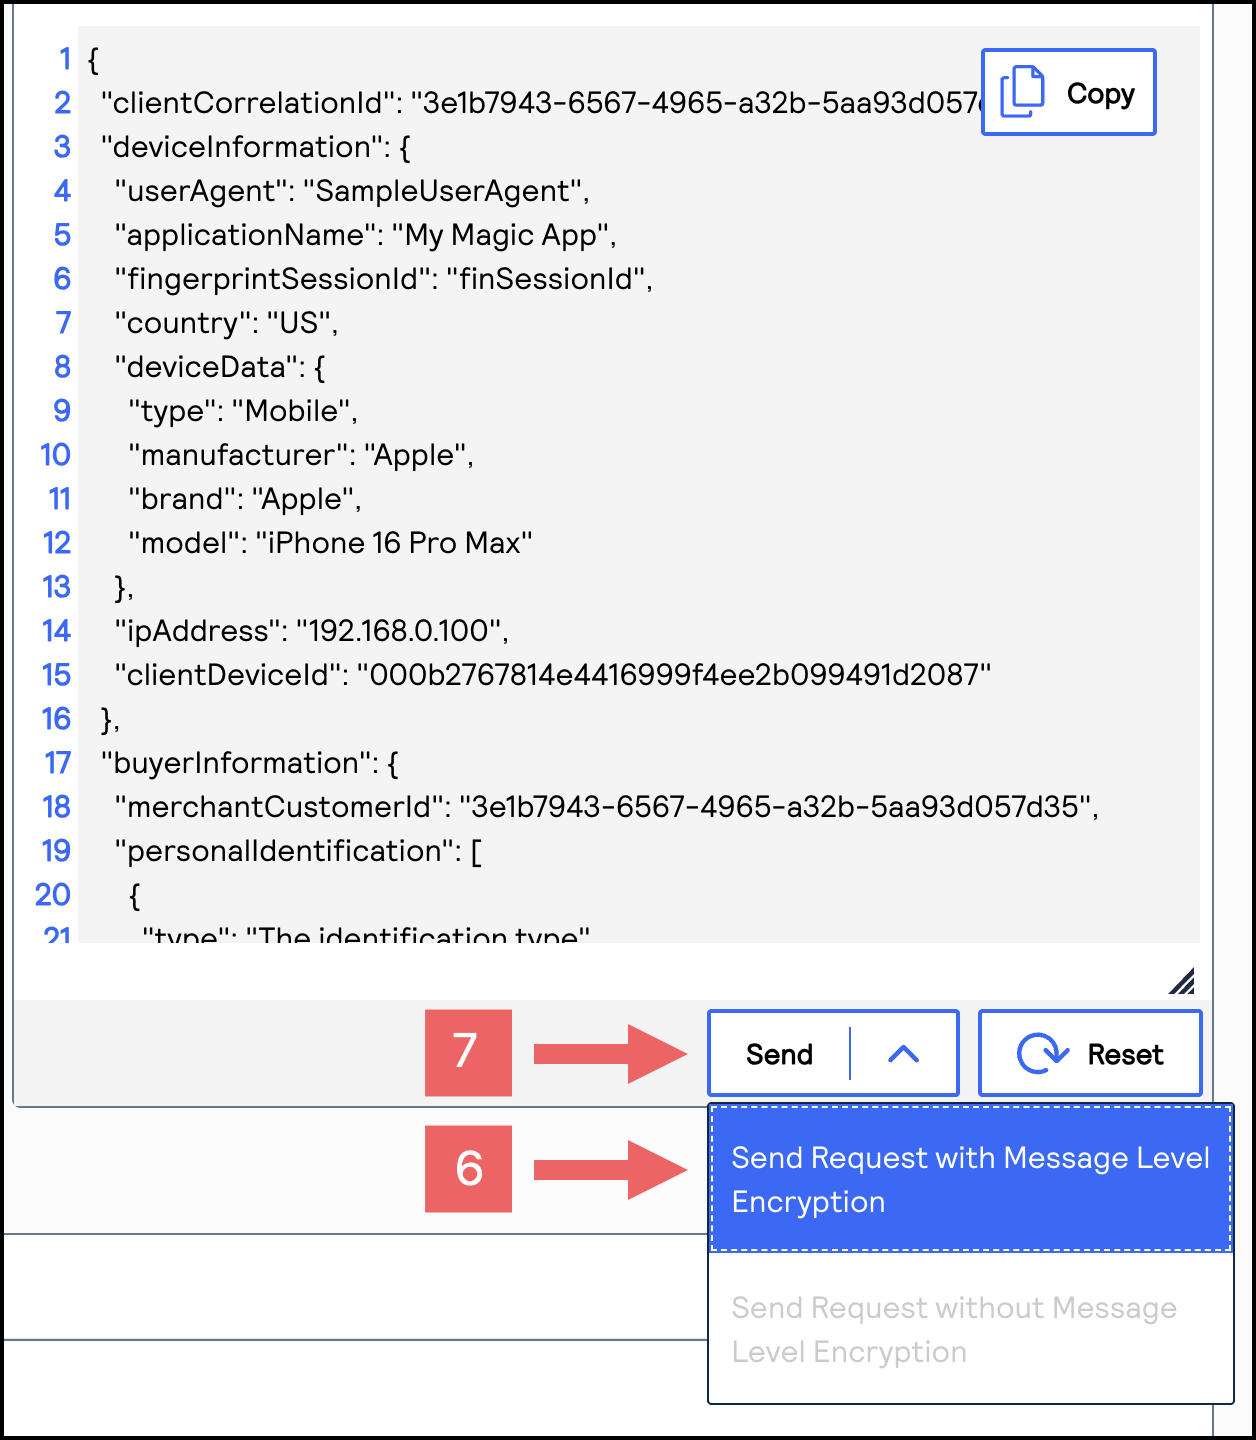
- From theSenddrop-down menu, chooseSend Request with Message Level Encryption.
- ClickSend.
- If aSuccess: HTTP Status Code: 201message displays in the Response section, your REST—API response MLE key is verified as properly configured.